A rolling pin is more than just a kitchen tool; it’s the gateway to perfectly crafted pastries, pasta, and more. Knowing how to use a rolling pin effectively can elevate your cooking, ensuring uniform dough thickness and flawless results. From the classic wooden pin to sleek marble designs, each type offers unique advantages. Mastering this essential skill unlocks a world of culinary possibilities, making every bake a success.
Understanding the Basics of a Rolling Pin
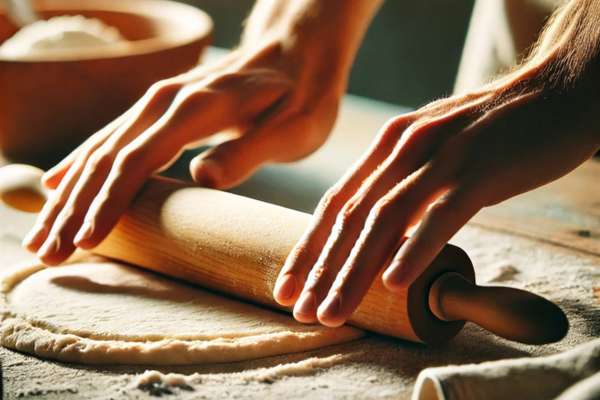
The rolling pin’s design is straightforward yet ingenious. The barrel—the central cylindrical part—does the heavy lifting, flattening and shaping dough with precision. Traditional pins often include handles for better grip, while French-style pins forego them, providing direct control for delicate tasks.
Each material serves a purpose:
- Wooden Rolling Pins: A timeless choice for versatility, offering excellent control and balance.
- Tapered French Rolling Pins: Ideal for precision work, such as shaping pastry edges or creating uniform dough thickness.
- Marble Rolling Pins: Perfect for temperature-sensitive doughs like puff pastry, as their cool surface prevents butter from melting.
- Silicone Rolling Pins: A modern solution for sticky doughs, with non-stick properties that minimize mess.
Selecting the right pin can transform your baking experience, making it as much about the journey as the result.
Preparing Your Workspace
Before you begin, a clean, organized workspace is essential. Dough is unforgiving to crumbs, dirt, or uneven surfaces. Wipe down your counters thoroughly and ensure they are dry. Dust the surface lightly with flour to prevent sticking, but use restraint—too much can alter the dough’s texture.
The rotary pin itself should be clean and dusted sparingly with flour. If using a wooden pin, ensure it’s free of residual moisture to avoid warping. Silicone pins, on the other hand, require minimal preparation, making them a fuss-free option for beginners.
Preparing the Dough
The quality of your dough directly impacts the success of your rolling efforts. Cold, pliable dough is your best ally. Too warm, and it becomes sticky and unmanageable. Too cold, and it may crack under pressure.
Start by dividing the dough into manageable portions if working with a large batch. Shape each portion into a disc—this initial step reduces uneven rotary and ensures uniform thickness from the start. Letting the dough rest for a few minutes can relax the gluten, making it easier to work with.
Rolling Techniques
Mastering the rotary pin requires a blend of finesse and strength. Begin by positioning the pin at the dough’s center and applying gentle, consistent pressure outward. Avoid pressing too hard at the edges to prevent uneven thickness.
Rotate the dough a quarter turn after every few rolls. This technique not only maintains a round shape but also prevents sticking. For delicate doughs, use rolling guides or spacers to achieve precise thickness.
Different recipes demand varying pressures:
- For puff pastry or pie crusts, light and even strokes are key to preserving flakiness.
- For pasta dough, firm and deliberate rolling ensures the dough is thin enough for perfect cooking.
Avoiding Common Mistakes
Even seasoned bakers encounter mishaps, but many can be avoided with simple adjustments:
- Over-Flouring the Surface: This can dry out the dough, resulting in crumbly textures. Use just enough to prevent sticking.
- Rolling Aggressively: Heavy-handed rolling creates uneven dough, leading to inconsistent cooking.
- Ignoring Dough Temperature: If your dough warms up too much, chill it briefly to regain control.
Patience and attention to detail are your allies in overcoming these challenges.
Using Specialty Rolling Techniques
For advanced bakers, rolling pins unlock a realm of possibilities:
- Laminating Doughs: This involves repeated rolling and folding to create layers, essential for croissants and puff pastry.
- Rolling Thin Sheets: Ideal for pasta or fondant, requiring precision and even pressure to achieve delicate results.
- Guided Rolling: Using thickness guides ensures professional-grade uniformity, particularly important for intricate pastries.
Cleaning and Maintenance
A well-maintained rotary pin lasts a lifetime. Wooden pins should never be submerged in water; instead, wipe them clean with a damp cloth and dry immediately. Silicone and marble pins are more forgiving, allowing for quick rinses.
For wooden pins, periodic conditioning with mineral oil prevents cracking and maintains a smooth surface. Store your rotary pin in a dry, temperature-stable environment to avoid warping or damage.
Conclusion
The rotary pin is more than a tool—it’s an extension of your culinary skill and creativity. By mastering its use, you gain control over every aspect of your baking. From delicate pastries to robust pasta sheets, the possibilities are as endless as your imagination.
Embrace the art of rotary, and with time, each glide of the pin will feel like second nature. Whether you’re a hobbyist or a professional, this humble tool will always be at the heart of your kitchen endeavors.